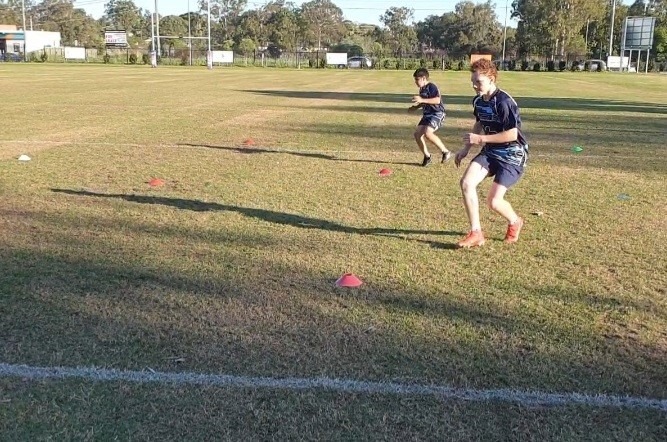
Agility Drill Workouts
Enhancing Athletic Performance: A Deep Dive into Agility Drill Workouts
Agility is a key component of athletic success, regardless of the sport you participate in. It’s the ability to move quickly and change direction with ease that often sets top-tier athletes apart from the rest. One of the proven techniques to improve agility is through “agility drill workouts”. This guide will take you through the foundational aspects of these workouts, and how to effectively implement them into your training regime.
The Starting Point: Deceleration Training


Before diving into the intricacies of agility drill workouts, it’s important to understand the fundamental concept of deceleration training. This is the first step in any agility drill workout, and it plays a crucial role in teaching athletes about proper deceleration mechanics. Mastering these mechanics is essential as it lays the groundwork for future change of direction skills such as cutting, drop steps, and more.
Deceleration training isn’t just about slowing down; it’s about controlling your body’s momentum in an efficient and safe way. This is key for athletes who need to change direction quickly without losing speed or balance, like a soccer player maneuvering around opponents or a basketball player making a quick pivot.
Implementing the Agility Drill Workout
Deceleration training is just the first step. The next part involves a structured and progressive approach to implementing the agility drill workout. This approach ensures that the athlete’s skill level and physical conditioning are taken into consideration, and the workouts are adjusted accordingly.
Weeks 1-2: Building the Basics
In the first two weeks, the agility drill workout begins with the athlete standing on the base line in a stagger stance position. From here, the athlete sprints to a cone placed at the 5-meter mark, before decelerating as quickly as they can. This basic drill is designed to introduce the athlete to the concept of rapid deceleration, and to start training their body to handle the physical demands of such movements.
Weeks 3-4: Raising the Stakes
Once the athlete has grasped the basics of deceleration, the agility drill workout moves to the next level. The same stagger stance is used, but the cone is now placed at a 10-meter mark. This increased distance forces the athlete to maintain a faster sprint for longer, and to decelerate from a higher speed, thereby further enhancing their ability to control their body’s momentum.
Coaching Cues for the Agility Drill Workout


The success of an agility drill workout lies in the details. Here are some coaching cues used in the workout to ensure proper form and technique:
- Drop your hips: Lowering your hips during deceleration can help maintain balance and stability. It also ensures that the force from deceleration is absorbed correctly, reducing the risk of injury.
- Small, fast ‘stutter’ steps: Quick, short steps are more effective in slowing down your momentum than long strides. This technique allows for a smoother transition from sprinting to a stop, and then into the next movement.
- Heel-toe foot contact: This refers to the order in which your foot should contact the ground when decelerating. Landing on the heel first, then rolling onto the toe, provides a more stable base and better control during deceleration.
- Stop in the shortest distance possible: The goal of agility drill workouts is not just to decelerate, but to do so efficiently. The aim is to stop as quickly as possible once you reach the cone, honing your ability to change direction swiftly.
In conclusion, agility drill workouts, with a focus on deceleration training, can significantly enhance an athlete’s performance by improving their ability to change direction swiftly and accurately. Remember, the key to success lies in the details, so pay close attention to the coaching cues and progress gradually to reap the benefits of these workouts.

